This is an article in a series describing the process I use to create a practice card. The practice I’m using to illustrate this process is one to “Call Back Power.”
After creating a layout (step 3) I begin thinking about how to “fill in” the layout. Specifically, I begin choosing a color palette, patterns and symbols with which to “paint” the image.
Choosing a Color Palette
When I think about color, I have a few objectives:
- The colors represent the intention of the spiritual practice.
- Colors complement one another and provide enough contrast so that the eye can easily move from one section of the artwork to the next.
For example, the artwork for the Empowerment practice uses human skin tones because I wanted this practice to include people of all skin colors. I also chose strong saturated colors to represent the practice intention: coming back to yourself and what’s important in the face of doubt or criticism.

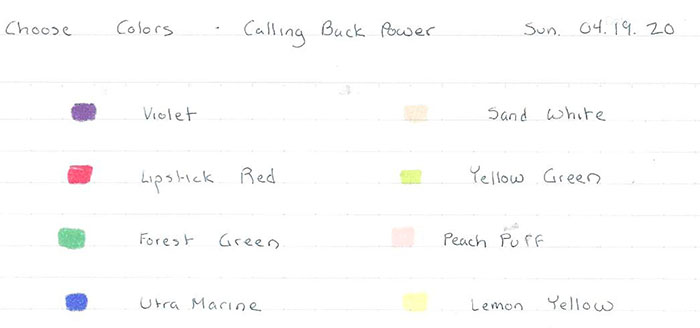
Calling Back Power is another practice with the intention of empowerment and I wanted to use strong, saturated, primary colors. To create contrast I chose lighter colors which are complementary on the color wheel.
Painting with Patterns
The practice card artwork is composed of patterns placed in segments of the layout. Like the process of selecting colors, I look for patterns that are representative of the practice’s intention.
For Calling Back Power, I used several resources including Adinkra symbols, vintage Japanese patterns, and vintage decorative elements. The Adinkra symbols are especially eloquent because they represent cultural values. I also love the simplicity and organic quality of vintage Japanese patterns many of which were used to create everyday items.
Once I choose a set of patterns and symbols I decide where I want to use them in the layout. Here is layout and how I plan to place patterns and symbols.
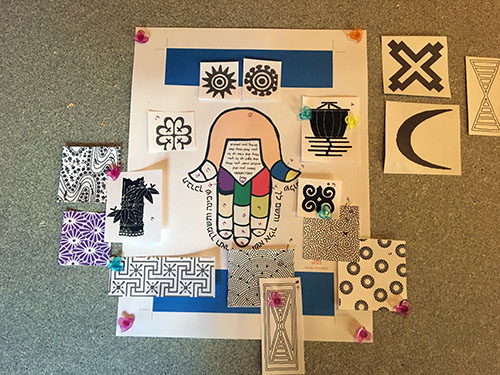
This gives me a precise plan for where I’ll place patterns and colors to use.
I use Adobe Illustrator to place and color the patterns.
Here’s what the final artwork looks like.

Next: Step 5. Writing out the practice.